
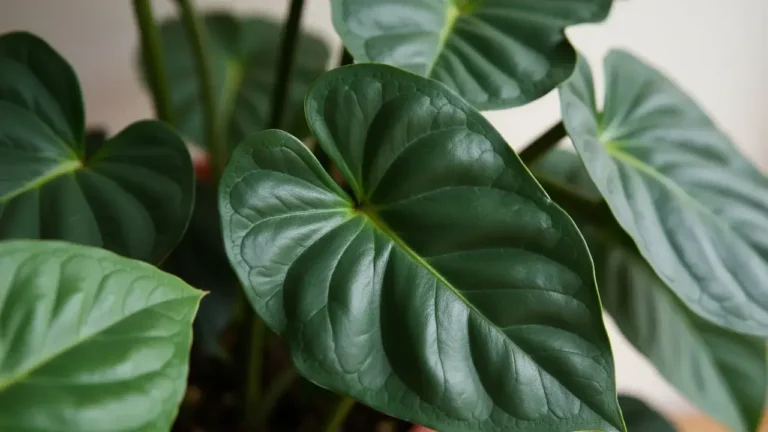
Well hello there, fellow plant enthusiasts! It’s a joy to dive into the world of houseplants, and today we’re focusing on a real gem, the Alocasia scalprum. This isn’t just any houseplant; it’s a captivating member of the Jewel Alocasia group, known for its striking appearance.
Often affectionately called the ‘Samar Lance’, a nod to its native home on Samar Island in the Philippines, this Alocasia scalprum boasts some truly unique features that make it a standout. Just look at those leaves! They have a wonderfully thick, leathery texture and are marked with deeply impressed veins that give them a unique, almost sculpted look. The leaves unfurl in a lighter green hue before hardening off to a stunning darker green, sometimes with a blue tinge, as they mature. The specific epithet, scalprum, even comes from the Latin word for a tool similar to a knife, fitting for the leaf’s narrowly lanceolate, slightly falcate shape.
Now, if you’ve spent any time with Alocasias, you know they can sometimes have a bit of a reputation for being, well, a little particular! They certainly appreciate consistent conditions and can “overreact to any stress,” which often shows up first in those beautiful leaves. But don’t let that deter you. While they might ask for a bit more attention than some other plants, understanding their specific needs makes all the difference.
The key to keeping your Alocasia scalprum happy and those distinctive leaves looking their absolute best lies in a few essential care practices. In this guide, we’ll walk through 5 key tips to help you unlock the secret to maintaining vibrant, healthy foliage and successfully growing this remarkable plant in your home.
Table of Contents
Tip 1: Finding the Alocasia Scalprum‘s “Sweet Spot” for Light
Alright, let’s get into the nitty-gritty of caring for that striking Alocasia scalprum and its gorgeous foliage. One of the most fundamental things any plant needs, and especially our more particular friends like Alocasias, is the right light. Think of light as the fuel for your plant; it’s essential for photosynthesis, the process that allows them to create energy and, in turn, grow those magnificent leaves. Too much, and you risk burning those beautiful surfaces; too little, and the plant just won’t thrive as it should.
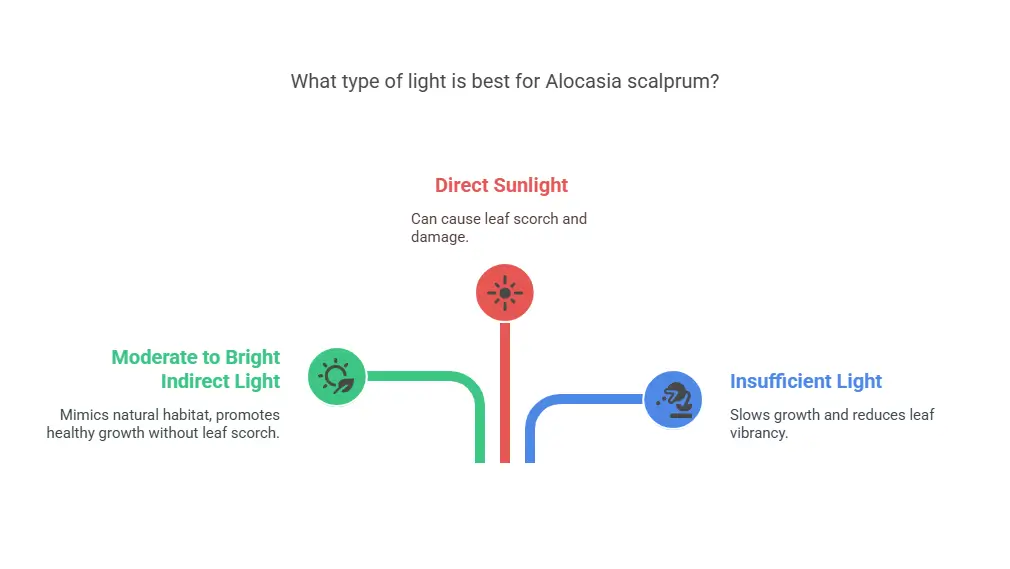
For the Alocasia scalprum, the sweet spot is definitely moderate to bright indirect light. This mimics the dappled conditions they’d experience in their native Philippines, tucked beneath larger plants. Placing your Alocasia scalprum in an east-facing window is often ideal, as it provides gentle morning light. A south-facing window can also work well, but here’s where you need to be cautious. The intense midday and afternoon sun coming through a south window can be too harsh. Always filter strong direct light with a sheer curtain or position the plant back from the window to prevent leaf scorch.
Speaking of leaf scorch, direct sunlight is a major culprit. It can cause those lovely leaves to develop unsightly bleached or light brown spots. Even that early morning direct sun, say from sunrise up until 7 or 8 am in an east window, might prove too intense for some individual Alocasia scalprum plants, as some folks have discovered. It’s always wise to observe your plant and see how it reacts.
On the other side of the coin, insufficient light will also impact your Alocasia scalprum. If it’s not getting enough light, you might notice that its growth slows down significantly, and those distinctive leaves may be smaller and not develop their full, vibrant color. Finding that balanced, indirect light is truly the first step to happy, healthy leaves on your Alocasia scalprum.
Tip 2: Mastering the Art of Watering (It’s Not as Simple as it Sounds!)
Okay, let’s talk about watering, shall we? It sounds simple enough – give a plant water, right? But for our lovely Alocasia scalprum, mastering the art of watering is absolutely critical, and perhaps one of the trickiest parts of keeping these sensitive beauties happy. Getting the moisture level just right is the key to those distinctive leaves thriving.
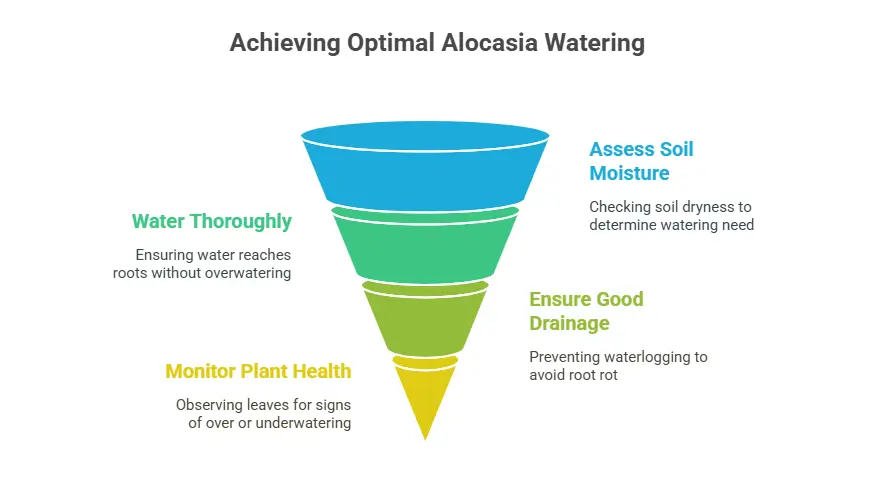
These plants hail from tropical humid climates, and while they appreciate consistent moisture, they are very prone to root rot if their roots stay wet. Think of it like this: they like a refreshing drink, not constantly soggy feet! The soil needs to be consistently moist, but never waterlogged. This is why good drainage is non-negotiable for your Alocasia scalprum.
Determine when to hydrate your plant? Forget watering on a strict schedule; the best approach is to feel the soil. Stick your finger into the pot, about an inch or two deep. When the top layer of soil dries out (about 1 inch deep), water thoroughly. Some experienced folks even suggest going a bit deeper, perhaps two inches. Be cautious with moisture meters, as they aren’t always the most accurate tools; trust your finger test first.
Now, what happens if you get it wrong? Underwatering your Alocasia scalprum means the soil dries out too much. This can lead to the plant wilting, its beautiful leaves losing their vibrant color, and growth slowing down. In extreme cases, like prolonged drought conditions, some Alocasias might even go dormant.
On the flip side, the more common pitfall is overwatering. This happens when the soil stays too wet for too long, suffocating the roots and leading to root rot. Signs include yellowing leaves or brown spots, and potentially the entire plant declining. Using a well-draining soil mix is paramount here; a chunky blend with components like orchid bark and perlite really helps water flow through effectively.
The type of pot can also play a role; while terracotta can help dry out soil for those prone to overwatering, plastic pots retain moisture more consistently, which some prefer for Alocasias, assuming you water carefully. Crucially, always ensure your pot has drainage holes and that you don’t let the plant sit in standing water in a saucer.
Ultimately, consistent moisture without sogginess, achieved by checking the soil rather than following a rigid schedule, is the art you need to master for your Alocasia scalprum.
Tip 3: Choosing the Right Pot and Crafting the Perfect Potting Mix
Alright, let’s get our hands a little dirty and talk about the foundation for a thriving Alocasia scalprum: the pot it calls home and the soil it grows in. This isn’t just about aesthetics; it’s absolutely crucial for the health of its roots and, in turn, those stunning leaves.
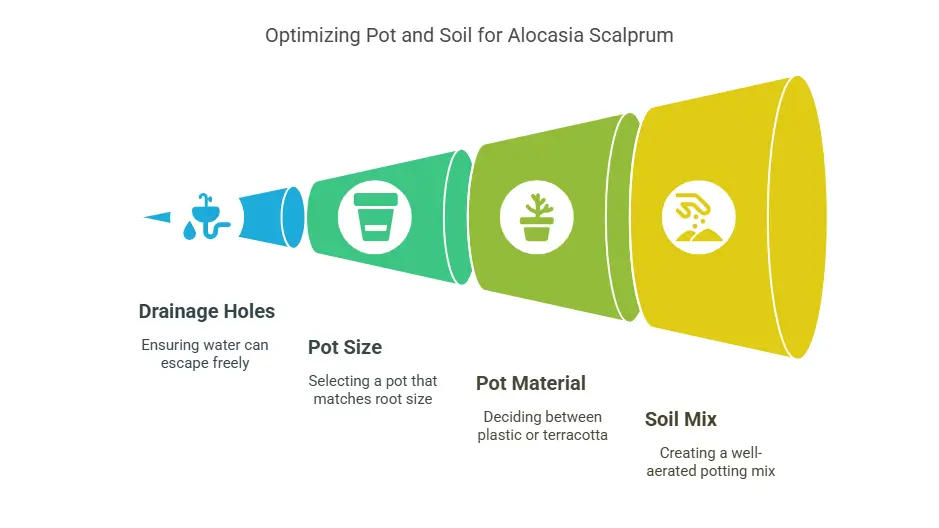
When it comes to selecting a pot for your Alocasia scalprum, the single most important feature is drainage holes. I simply cannot stress this enough! Alocasias are incredibly sensitive to soggy soil, which is a direct path to root rot. Water needs to be able to escape freely. While opinions vary on pot size – some suggest they like to be a bit snug or rootbound, while others haven’t found size to be the main issue – ensuring the pot isn’t excessively large for the plant’s current root system can help prevent the soil from staying wet for too long.
As for material, plastic pots tend to hold moisture more consistently, which some prefer for maintaining that ‘consistently moist but not wet’ balance. Terracotta, on the other hand, can help dry out the soil more quickly, which might be beneficial if you tend to overwater. Whichever you choose, just be sure those drainage holes are present. Some find using a clear pot helpful for keeping an eye on root development and moisture levels.
Now, onto the potting mix itself. Forget dense, heavy soil. Your Alocasia scalprum thrives in a chunky, well-aerated mix that mimics the looser conditions of its native tropical environment. This allows for vital air circulation around the roots and ensures that while the mix retains some moisture, excess water drains away quickly. A good recipe often includes components that create that essential structure and drainage. Think a blend of standard indoor potting soil mixed generously with materials like orchid bark and perlite.
This combination provides aeration, drainage, and helps prevent the mix from compacting over time. Some experienced growers opt for an even chunkier mix, sometimes relying mostly on orchid mix and perlite, especially if they are worried about overwatering. The key is to create an environment where the roots get enough moisture but are never waterlogged, safeguarding your beautiful Alocasia scalprum from potential root rot. Getting this mix right is truly fundamental to seeing this plant flourish.
Tip 4: Providing That Tropical Boost: Humidity for Happy Leaves

Ah, humidity! This is where we often have to work a little magic to truly make our tropical beauties feel at home. Our lovely Alocasia scalprum, hailing from the tropical humid climate of Samar Island in the Philippines, is no exception. In its native environment, the humidity typically hovers between 60% and 70% year-round. Replicating something close to this indoors is absolutely key to keeping those distinctive, sculpted leaves looking their absolute best.
These plants really do appreciate higher humidity levels. When the air in our homes is too dry, especially during winter heating or summer air conditioning, your Alocasia scalprum can show its displeasure. You might notice the edges of those beautiful leaves starting to crisp or brown, or the plant might just seem a bit lackluster. Low humidity is definitely a common struggle for indoor gardeners trying to keep tropicals happy.
Fortunately, there are several ways to give your Alocasia scalprum that much-needed tropical boost. Investing in a humidifier is perhaps the most effective way to raise ambient humidity over a larger area. If a smaller humidifier isn’t cutting it, a larger one might be necessary to reach those target levels. Grouping your humidity-loving plants together also helps create a beneficial microclimate, as plants release moisture through transpiration.
While misting can provide a temporary albeit fleeting boost, placing the pot on a pebble tray filled with water (making sure the pot sits on the pebbles, not in the water) is a simple, consistent method. Some growers even find success with semi-hydro mediums like LECA or perlite/moss mixes, which naturally provide high humidity to the root zone, though this is a different approach to soil care.
Ultimately, providing consistent, high humidity is vital for the health and vibrancy of your Alocasia scalprum, mimicking the conditions of its island home and helping it truly thrive.
Tip 5: Feeding Your Scalprum and Decoding Leaf Signals
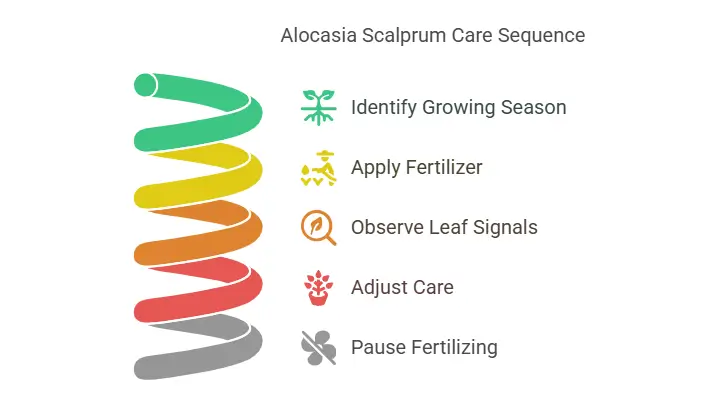
Alright, let’s dive into keeping your Alocasia scalprum well-fed and, just as importantly, learning to read the subtle (and sometimes not-so-subtle!) messages its leaves send you. Fertilizing isn’t a year-round affair, and understanding what your plant is trying to tell you is half the battle in keeping it happy.
When your Alocasia scalprum is actively growing – typically during the spring and summer months – it benefits from some supplemental feeding. Think of it as giving your plant the extra energy it needs to push out those incredible, textured leaves. I find that feeding once per month with a diluted general houseplant fertilizer at half strength during this period is usually sufficient. Always be sure to protect your surfaces when watering and fertilizing to avoid any drips causing damage. During the winter, or if your plant enters a dormant state and isn’t producing new leaves, you can hold off on fertilizing entirely.
Now, let’s talk about decoding those leaf signals. Your Alocasia scalprum is pretty communicative if you know what to look for, and its leaves are the primary indicators of its health and needs.
- Yellowing Leaves: This is a common one, and can signal a few things. Often, yellowing leaves on an Alocasia scalprum point towards overwatering and potential root rot. However, if the soil is consistently dry, yellowing can also be a sign of underwatering. Sometimes, especially if the plant is flowering, older leaves might yellow and die off as the plant redirects energy. Nutrient deficiencies, like potassium, can also cause yellowing. It’s crucial to feel the soil moisture to help narrow down the cause.
- Brown Spots or Crisping Edges: If you see brown spots or the edges of the leaves are becoming dry and crispy, this can indicate low humidity or potentially root issues from overwatering. Cold temperatures or drafts can also cause brown tips.
- Bleached or Light Brown Spots: Direct sunlight is the likely culprit here. If your Alocasia scalprum is getting too much unfiltered sun, those beautiful leaves can get what looks like sunburn or leaf scorch, resulting in bleached or light brown patches. Even direct morning sun up until 7 or 8 am might be too much for some plants.
- Wilting Leaves: When the leaves of your Alocasia scalprum start to droop or wilt, it’s often a sign that the plant is underwatered and the soil has become too dry. A good drink should help it perk up.
- Leaf Drop: Alocasia scalprum plants can be sensitive to stress and significant changes in their environment, sometimes reacting by dropping leaves. This can be linked to watering issues, but also things like temperature fluctuations or just adjusting to a new location. Don’t despair if it drops leaves; they grow from corms and can sprout again under the right conditions.
By observing these visual cues, you can often pinpoint what your Alocasia scalprum needs, whether it’s an adjustment to your watering routine, more humidity, better light, or maybe just a little time to acclimate. Learning this plant language is truly rewarding!
Conclusion: Enjoying Your Beautiful Alocasia Scalprum
Well, we’ve covered quite a bit about the wonderful Alocasia scalprum, from understanding its origins to providing the right conditions for it to thrive. Cultivating this unique tropical beauty truly is a rewarding experience. With its distinctively textured, narrow, lance-shaped leaves and deeply impressed veins, it adds a touch of the exotic to any indoor garden.
By paying attention to the key elements – providing moderate to bright indirect light, keeping the chunky potting mix consistently moist but not waterlogged, ensuring high humidity, and feeding judiciously during the growing season – you’re well on your way to success. And remember, observing your plant’s leaves is like listening to its needs – they’ll tell you a lot about how your Alocasia scalprum is feeling.
Don’t be discouraged by the occasional dropped leaf or a plant that decides to take a break; these plants grow from underground corms and often bounce back. Enjoy the process of learning and growing with your Alocasia scalprum, and appreciate the stunning foliage it offers when it’s happy.
Frequently Asked Questions about Alocasia Scalprum
Here are a few common questions people have about caring for their Alocasia scalprum:
- Why are the leaves on my Alocasia scalprum turning yellow or browning? Yellowing leaves, especially older ones, can be a sign of overwatering or potential root rot, as this plant doesn’t like sitting in soggy soil. However, insufficient watering can also cause yellowing or browning, as can low humidity. Sometimes, if the plant is putting out new growth or flowering, it might reabsorb nutrients from an older leaf, causing it to yellow and die off. Brown, crispy edges often indicate low humidity. Direct sunlight can also cause bleached or light brown spots, like sunburn.
- Does Alocasia scalprum go dormant? Yes, Alocasia scalprum can go dormant, particularly if exposed to cold temperatures below 60°F (15°C) or significant stress. If conditions aren’t ideal, it might die back to the corm.
- What should I do if my Alocasia scalprum loses all its leaves? Don’t give up! These plants grow from a bulb-like corm underground. As long as the corm is firm, you can keep the soil slightly moist and wait for new growth to emerge when conditions improve.
- Is Alocasia scalprum the same as ‘Samar Lance’? Yes, Alocasia scalprum is known by several synonyms in cultivation, including Alocasia ‘Samar Lance’, Alocasia ‘Samar’, and Alocasia ‘Samar Prince’. The name ‘Samar Lance’ likely originates from Samar Island where the species is found.
- Is this plant rare? Alocasia scalprum is endemic to Samar Island in the Philippines and is not represented by wild-collected herbarium material. Due to its limited habitat and accessibility challenges on Samar Island, it is considered quite rare in private collections outside of the Philippines.
- Is Alocasia scalprum toxic? Yes, Alocasia scalprum is considered harmful to pets. Store the plant safely away from pets or wildlife to prevent nibbling.
By understanding these aspects of Alocasia scalprum care and being mindful of its signals, you can enjoy this distinctive plant for a long time.